Tuesday, January 31, 2012

Trash Pantry: Three Bean Salad

Three Beans for Three Bean Salad
Garlic and Shallots
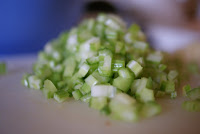
Celery
Lemon Juice
Basil and Parsley
Lemon Zest
Welcome to another edition of trash pantry. Now, I'll admit that it's pretty hard to get excited about anything called a three bean salad. This is basically the dish that your Aunt Susan brought to every single barbecue and it lay heating up in the sun with nary a soul paying it a cent of attention among the hot dogs, hamburgers, potato salad, corn on the cob, watermelon and other treats. But as it so happens, my pantry is pretty bare, and I've got a can of chickpeas, a can of kidney beans, and a can of cannellini beans. Then there's some left over herbs that are on the verge of turning, and a few lemons. That sounds like a pretty good start to a dish to me.
So to be honest, I actually based this little experiment on a recipe I had recently seen on Serious Eats. The differences are minor, mainly being that my ingredients varied a bit, but the premise was the same. So, just to clarify, the ingredients I used were:

My 3 cans of three different beans (chickpea, kidney, cannellini) - instead of the 3 cans of cannellinis recommended
1 large garlic clove, minced
3 tablespoons finely chopped shallots
1 large rib celery, finely diced
1/4 cup extra virgin olive oil - the original recipe recommends a 1/2 cup which just seemed like it would make everything kind of soupy
1/4 cup freshly squeezed lemon juice
Zest of one lemon
1 teaspoon kosher salt
1/2 teaspoon freshly ground black pepper
3/4 teaspoon sugar
1/2 teaspoon Worcestershire sauce
1/2 cup half chopped Italian parsley and half chopped basil - used instead of mint... because lovely as it sounds, I ain't got no mint

Ta-Da! Three Bean Salad
After mixing up everybody in a big bowl, this thing was actually pretty darn good. It was fresh, hearty, and delicious. The celery added a nice little bite, and the tartness of the lemon and the zest added a real nice kick to go along with the more punchy herbs that I had substituted for the recommended mint. If I were planning to bring this anywhere, and had proper time to prep, I might start with dried beans and soak them overnight to give the whole dish a little bit more of sturdy mouthfeel, as canned beans can be a mush-fest. Nevertheless, I'd say this was another victorious battle in the everlasting war known as Trash Pantry.

Saturday, January 28, 2012

Island Creek Oyster Bar

Island Creek Oyster Bar
When rumors started to percolate regarding the opening of a restaurant featuring Island Creek Oysters in the Fenway neighborhood, I was pretty darn jazzed. Great oysters, great variety of oysters, available within close proximity to my first love, Fenway Park? That's a recipe for perfection. 
The Dining Room
Our first trip to the oyster bar was during late summer of last year, obviously right before a Sox game, and the general atmosphere of the restaurant puts you at ease from the moment you walk in. It's a big space, but with emphasis on all things oysters, and the famous oyster farm down in Duxbury, MA. A single wall to the back is composed of stacked oyster shells, while a far right wall features an oddly upside down photo of the oyster farm, stacks and stacks of crates, and the reflection of workers shimmering on cold New England waters. Of course, the main focus of the restaurant is the oyster bar, prominently positioned in the middle of the restaurant, with heaps of ice, and seemingly endless varieties of carefully harvested and selected oysters. After this first visit, and our fantastic experience here, my bigger half bought me Shucked: Life on a New England Oyster Farm for St. Nicholas Day right before Christmas. Reading this book only again awakened the need to suck down these beauties, and as it's January, the time where oysters build up fat supplies in the cold waters, and likewise the time where they are plumpest and sweetest, we had to make a special stop for brunch at the oyster bar. 
Wall of Oyster Shells
Now, I'm not really a big fan of brunch. I think breakfast kicks ass, and lunch likewise can be the best way to motivate you to get through a workday. However, brunch seems to half-ass the best things of breakfast and lunch in a really bad way. Therefore, I'll have to disclose that the other brunchy items that we had ordered during this meal are probably things you can skip. The chowder tasted a little too creamy and borderline butter cheesy, the film on top a sign that perhaps this was a batch left over from dinner service the night before. Likewise, the cod cakes and the smoked red trout were good, but since they arrived after the oysters, well, it's kind of like the warm up band playing after the headlining act. Therefore, if you are an oyster fan, I would say forgo all other items on the menu and stick to your guns. Spend that extra twenty or so that we foolishly wasted on other items on the big show, and just get a few more oysters. 
Batter Up!
All this being said, the oysters and littlenecks at Island Creek Oyster Bar were spectacular. They obviously have a very specific variety of oysters that have been tasted and tasted and tasted by the restaurant crew and oyster farmers alike, specifically selected for the menu at the restaurant. While I do like kumamotos, and think that they are a fantastic way to dip your toe into the world of oyster consuming, I would stay stick to the New England variety... stay local... because these shellfish haven't traveled very far at all, and freshness is key. Plus, we grow fine oysters in New England. Show your colors. So without further ado, here's a little insight into the oysters we chose, all from Massachusetts:
Island Creeks
1) Island Creeks: These oysters are obviously the ones that gave wing to this entire restaurant. Hailing from an oyster farm and business grown out of Duxbury, Massachusetts, Thomas Keller has called them the perfect, most consistently delicious oyster. These oysters, at first glance, are perfectly shucked, just as all the others are, with a generous amount of liquor still swimming in the neatly placed half shell. A single bite delivers a burst of saltiness, along with that ever satisfying chew that comes with a cold, fresh oyster. With each chew, the oyster also lets out a little bit of sweetness. Island Creek oysters are indeed consistently a treat, and absolutely delicious.
Sunken Meadows
2) Sunken Meadows: These are grown out of Eastham, and at first glance are slightly more plump and fill out the shell a bit better than the Island Creeks. They were super shiny, super juicy oysters, and had a meatiness that just kept going. Due to the fattiness of these plumpers, the sweetness was only balanced by the briny flavors released with every bite. I think that these may have been my favorite of the ones that we tried.
Peter's Points
3) Peter's Points: Peter's Points hail from Onset, Massachusetts, grown in an area known as Fisherman's Cove just off of Cape Cod Canal. They were also very good. They were a bit less salty and meaty than the other oysters that we had tasted thus far, and therefore perhaps a little more sweet. It was a clear bite of another fatty, glucose-rich oyster. The unctuous mouthfeel was just as enjoyable as the previous two varieties. 
Spring Creeks
4) Spring Creeks: Spring Creeks are from Barnstable, Massachusetts, which seems to be an up and coming area to raise oysters. These particular oysters are grown in trays, and then tumbled, a technique used to produce a very deep and round cup. This was actually the first visually stunning things that we noted about the oysters grown in the mud flats around the mouth of Spring Creek. The flavor of the actual oysters were again meaty, but I think that these were the briniest of the variety that we tried. They were salt-bombs, perhaps closest to the flavor of classic Wellfleets, which is always a welcome flavor to enjoy in an oyster tasting. 
Wild Marions
5) Wild Marions: Wild Marions come from Sippican Harbor, and these were the wild card in the bunch that we had ordered. They looked different than the others, with a more elongated shell, shaded slightly red from the mineral-rich waters where they had been grown. As you might anticipate, while these oysters were also salty, they were notably irony and minerally, maybe closer to some of the European oysters that I've had the pleasure of tasting overseas. Definitely worth ordering.
First Lights
6) First Lights: First lights are grown out of Mashpee, an interesting offering from the Wampanoag Tribe in Massachusetts. After the saltiness of the Wild Marions, these smaller oysters offered up a less in your face brininess and a bit more subtle sweetness to round out our oyster tasting. More like the first two oysters we had tasted, they were chewy, crisp, and light. 
Littlenecks
7) Littlenecks: Duxbury has one more trick up its sleeve, dishing out wonderful, chewy, briny and sweet at the end littlenecks. Littleneck clams are a treat to be had, whether steamed up in a big pot of clam bake goodness, or served raw on the half shell, as we enjoyed here. Since they are a bit chewier than oysters, it may take a little bit of coaxing to get a newcomer to slurp up a raw littleneck, but the payoff, as you probably know, is so big. They are just as fatty as the oysters, but with extra meaty mouthfeel and the sweetness throughout. Littlenecks from Duxbury are not to be missed.
I can't emphasize enough what a great restaurant this is to go taste some local oysters. Still located within the heart of the city, but in a large enough space that you have better odds at snagging a seat compared to say Neptune Oyster (also wonderful) in the North End, the restaurant is bustling, loud and exciting. Just go for the oysters, and definitely make a habit of it.


DETAIL RUNDOWN:
Island Creek Oyster Bar
500 Commonwealth Ave
Boston, MA
http://islandcreekoysterbar.com/

Tuesday, January 24, 2012

Post Beer Fest Chinatown: Dumpling Cafe Boston

As you well know from the last entry, we left the Park Plaza Castle, this year's home to Beer Summit's Winter Jubilee, a little stumbly... not falling down stumbly, but that "in a good place" stumbly. So, shuffling along safely through the powdery falling snow, we knew that the only way to fight back the sleepy booze wave was to head to Chinatown. And with the falling snow, and a sobering chill in the air, the siren call of soup dumplings was overwhelming. Instead of heading for the more popular, older Gourmet Dumpling House (a staple of Chinatown), we went over to Dumpling Cafe, where I had visited previously for lunch with a colleague and had the good fortune of enjoying excellent soup dumplings and just as satisfying appetizers.
Poached Pig Intestines
So on this occasion, to start out, we went for the poached pig intestines. I'm sure that this sounds less than appetizing to some, but if you are afraid of offal, I assure you, this is an excellent gateway. The steaming mound of slow poached, tender strips of pork intestine smell nothing of the gaminess of other innards that we've noshed on. They are succulent, springy, and again, tender as all hell. The dipping sauce that accompanies the intestines is addicting. It's a rather thick sauce, with tones of sugar, soy sauce, and lots of spicy ginger. Combined with the intestines, you have a rich meaty bit of offal, complimented with sweetness and saltiness that really satisfies the palate. This is a must order appetizer.
Mini Juicy Buns
Next, we also ordered a single order of pork mini juicy dumplings, also known as xialongbao. They arrived in a bamboo steamer, as is customary, and on lifting the cover, steam escapes conveying a savory aroma that could wake the dead.
For those who are uninitiated in the world of soup dumplings, the process of eating is simple at best, and sloppy at worst. Tenderly lift a soup dumpling onto your spoon. Gently prick a bottom edge with your chop sticks. With a soft hand, prick the soup dumpling with your chop sticks in a manner that will drain the hot, savory, unctuous soup into your spoon. Enjoy the soup... savor its depth of pork broth flavor. Now, lift the remainder of your dumpling with your chopsticks, and give a quick dip into the ginger/soy/vinegar sauce. The salty, sour sauce will really bring the entire meaty, tender dumpling together in a symphony of flavor as you slowly enjoy the release of juices with each bite. These are delicious dumplings, and the process of eating itself only makes the entire dish more enjoyable. Soup inside a dumpling? Shut up!
Drain the soup, drink the soup
and dip in that ginger soy
In fact, I cannot lie, the soup dumplings were so perfect, so plump, so juicy, that we had to go in for a second order. This time, we went for the pork and crab mini juicy buns. They arrived soon after the first batch, a cute bamboo steamer opened to reveal one of life's simple pleasures. The crab meat and pork offered layer after layer of umami, of course, only elevated by the tablespoon or two of soup that drained out of each dumpling after a simple chopstick prick. If I were to choose between the pork soup dumplings or the pork and crab soup dumplings... I wouldn't. I'd order both. You should too.
Taiwanese-style Pork Belly
The last item that we ordered arrived midway through our second soup dumpling order. We had the Taiwanese-style pork belly. Boy was it delicious. Smothered and saturated by a salty, sweet, tangy sauce, the pork belly was pull apart tender. It was fatty, and if you like bacon, you would savor these morsels bite after bite after bite. Pork belly is a must have for my bigger half, and these arrived on a bed of nicely wilted greens so we could check the box on the whole eat your vegetables thing. With a bite of rice, kissed by that wonderful dark sauce, and the succulent, unctuous, well-prepared, steaming hot pork belly, well, we felt like kings.
Of course I'll be back to Gourmet Dumpling House, which for whatever reason, among our friends, we lovingly refer to as the "Dumpy Goldfish." Both versions of soup dumplings are delicious. But for what it's worth, I think that the Dumpling Cafe definitely has game, particularly with a few of their delicious appetizer offerings, like the pork intestine described above that must have crack in it, because it's just that addictive. I think it's time to give the semi-newcomer a try.


DETAIL RUNDOWN:
695 Washington St.
Boston, MA
http://www.dumplingcafe.com/

Sunday, January 22, 2012

Epic Weekend! Beer Summit's Winter Jubilee

Winter Jubilee at Boston's Park
Plaza Castle
Soused Blueberries got a little soused this weekend on some incredible beer. Beer Summit's Winter Jubilee event this year was held at Boston's Park Plaza Castle, an incredible venue for such a great event. Reminiscent of a beer hall, and chock full of beer aficionados, surprisingly devoid of over indulging a-holes, one had more than enough time and space to wander past all of the booths to sample whatever your heart might fancy. This is only the second time I've had the pleasure of attending a beer festival in Boston, the first being the American Craft Beer Fest put on by Harpoon Brewery and Beer Advocate in June. The two felt a bit different, with this beer festival offering a few international brews that I've never had on tap before. The second big difference seemed to be that the pours here were much bigger, and the venue itself a little more intimate. Either way, I highly recommend attending one of these fantastic beer fests if you want to he opportunity to enjoy a vast array of fine craft brews. 
So while we can't delve into all of the offerings (frankly because I don't remember them all... and tipsiness prevented extensive note taking), we will go ahead and share a few of the brews that spanned both old favorites available to experience on tap and new revelations. 
Staropramen (middle tap)
1. Staropramen - Czech Lager. Many of the Czech lagers that I've had in the states are frankly kind of skunked. Not this one. It was hoppy, and a tad spicy. The bubbles are fresh, and the taste only kissed by alcohol, leaving you with a refreshing, aftertaste-devoid brew. The care that they must spend to preserve the taste of the beer through temperature control is very evident, and while this may be one of the few places that anyone can try it in the states on tap, I look forward to the beer becoming more widely available in Massachusetts, even if only in bottles.
Jack's Abby's Smoke and
Dagger (left)
2. Jack's Abby' Smoke and Dagger: Jack's Abby out of Framingham, MA provided a delicious smoked black lager. This beer was kind of like a malty schwarzbier, or a German black lager. Overall, it was very smooth, refreshing, and had just a hint of smoke. A nice surprise from a local brewer.
Crispin Cider's Superexpress
3. Crispin Cider's Superexpress: This may very well be the best cider that I've ever had. Instead of your usual very fizzy hard cider, these guys brought a couple offerings that used unusual yeasts to create their alcoholic brew. The one that I sampled was made with a sake yeast, producing a super clean cider, still very tart, and less bubbly than the soda like beverage that you would expect. It drank like lemonade and left one refreshed and ready for more beer. 
Brooklyn Brewery's Sorachi Ace
4. Brooklyn Brewery's Sorachi Ace: Brooklyn Brewery really brought it with this beer. This saison features a rare hop bred from Japan. The smooth, unfiltered beer has a little bit of a yeast funk that's actually pretty well hid under aromas of lemon and lemongrass. They classify this offering as a farmhouse ale that uses a Belgian ale yeast, and it was quite a treat. Frankly, I think this might be a perfect glass to go with my next evening cheesing hour. 
Seadog's Honey Porter
5. Seadog's Brewer's Choice Honey Porter: Slightly sweet and very smooth for a porter. There wasn't much of a hop flavor, but from first sip, this is just a very likable beer. For a little insight into my bigger half's earlier years, he was tickled that Seadog was doing a honey porter, because one of his first experiences with craft brews was with the honey porter produced ages ago by a smaller Sam Adams. Yes, he was underage. 
Ommegang's Aphrodite
6. Ommegang Aphrodite: While I went for a few sips of the very potent and delicious farmhouse ale by Brasserie d'Achouffe called Chouffe Biere du Soleil (fabulous...lemony, floral, great head), I think the bigger half had a more interesting pour in the Ommegang Aphrodite. This beer, brewed with a wild yeast called "Brett yeast," had a sour and fruity character with just a touch of raspberry flavor at the end. Again, nicely refreshing and funky tart, the beer had the depth typical of a fine Belgian ale. 
Sam Adam's Vixen
7. Sam Adam's Vixen: How can you not try something called Vixen? It's just a good name. But to add to the temptation, this batch of chocolate chili bock (yes, you read right... chocolate chili bock) was only brewed once. Sam Adams, known for their technical ability to brew high gravity lagers, had an interesting combination in this particular beer. It hits you in the face hard and strong with deep chocolate tones, giving way to a spiciness at the back of the neck from the chili. I know that chocolate overtones in stouts and porters are becoming more and more popular, maybe a slight fad in current day craft brewing. But to have one that is so flavor profile forward is very bold. I was so glad that they brought it to the beer fest. 
Peak Organic's Pommegranite
Wheat Ale
8. Peak Organic's Pomegranite Wheat Ale: I'm a girl so shut your mouth. Plus, if you were comfortable in your manhood, you'd probably dig this beer too. I know that with the snow falling on Saturday, we were all half psyched that it finally feels like winter, and also one foot out the door onto summer days down the Cape. Now, this would make an excellent grillin' outside, playing horseshoes, knocking a few cold, refreshing, sweet and clean beverages back all afternoon type of brew. This beer was fresh with only a touch sweet unlike other wheat beers like Blue Moon. Only after a gulp or two down will a hint of pomegranate start to make itself evident, adding to the refreshing, summer-like vibe of this wonderful beer.
Watch City Brewing's Beejezus
9. Watch City Brewing's Beejezus: This was a tricky brew. I could have sworn to you that there was a heavy handed punch of rosemary in the beer. From the initial smell, to the last drop trailing down your throat. But I was wrong. This is a potent and herby, spicy ale, giving way to layer over layer over layer of complexity. The sign, we later discovered, disclosed that the key ingredients to the Belgian brew were bee balm, lemon balm, and jasmine tea. I think I would only be able to drink a single glass of this beer... but to have another go at it could reveal an encyclopedia of tastes and flavors to document. It is definitely worth trying. Plus, isn't it fun to think about beer?
Pretty Thing's Jack D'Or
10. And for the last beer of the evening, before stumbling over to Chinatown, we had to make it over to our favorite local brewer: Pretty Things. Tenant brewers, Dann and Martha Paquette are basically my personal heroes and were both proudly standing at the Pretty Things booth at both beer fests that we have attended. A suitable beer to end the evening for me is their Jack D'Or, which frankly I could drink at any time with any meal at any time of day. Gold and hazy in color, the beer tastes clean and yet also has a saison style spice to it. It's a little sour, a little hoppy, a little fruity and floral, and very balanced, consistently producing a clean mouth feel and a nice fluffy head. It is a beer that has character, which is a poor way to describe it, unless you're currently drinking it, and then it totally makes sense. 
Let's hear it for beer! Let's hear it for all brewers, local, international, small and large. I love that beer after college has evolved into something so fascinating, and diverse, with both subtle flavors to discover, and in your face kerpow flavors that will annihilate the boredom that occupied your palate for all too long. (Suck it, Coors.) Now, if you'll excuse me, the bigger half has been inspired, and a big pot of five pounds of golden light dry malt, three pounds of sparkling amber malt, a whole heap of Sonnet Golding hops are simmering on the stove. We'll keep you posted.

Monday, January 16, 2012

Bacon and Date Scones

Medjool dates, pitted
Let's face it, just about everything natural in this region has gone and died or lies dormant until the weather decides to swing sometime after the Ides of March. So it's time to get creative, get bold, and try something that is unapologetically in your face awesome in the good fight of warding off the volatile cold weather. Rolling through Salem's Milk and Honey, there were a few nice looking heads of lettuce, some mushrooms, lots of basil, but nothing really inspiring at the moment. Then, I glanced over past a few potatoes and hot house tomatoes and there they were. Jumbo Medjool dates... dried and packed in a little plastic container, about a pound or so of them for about two bucks. Sold.
But what to do with dates? I don't know. Eat them? Mix them with yogurt and honey? What goes with dates? They're so sticky and sugary... it would take a real blast of salty and smokey to produce something memorable. Smokey and salty? Did someone say bacon? A quick search on epicurious on the words bacon and dates quickly produced a recipe for bacon and date scones. The ingredients were limited, and the steps a little bit cumbersome, but definitely doable.
So, due to lack of a couple ingredients, we had some substitutions to the original recipe. Here are the ingredients I used:


10 ounces thick-cut, smoked bacon slices
2 cups all purpose flour
1/2 cup sugar
1 1/2 teaspoons baking powder
3/4 teaspoon baking soda
1/2 teaspoon coarse kosher salt
3/4 cup coarsely chopped pitted Medjool dates
1/2 cup (1 stick) chilled (really frozen) unsalted butter
2/3 cup whole milk


So to start out I mixed all the dry ingredients in a large bowl with a whisk, and set it aside. At this time, I also prepped the dates by pitting them, and roughly chopping.
Bacon, still tender, rough chop
The next step is to pay proper attention to the bacon. I purchased some very nice applewood smoked, thick-cut bacon from Milk and Honey. This bacon has a wonderful smokey smell and a great texture from being so thick. I fried up the bacon in batches in a large frying pan, being careful to remove them from the pan before they reach that typically desired crispy stage. You want the bacon to be cooked through, but not crumbly. Also, drain the fat from the pan after each batch into a suitable vessel. This fat is reserved for brushing over the scones right before baking.
After the bacon had been cooked, I went ahead and roughly chopped each stip into about 1/8 of an inch pieces. My preference for these scones was to get pretty big punches of bacon in each bite.
With the bacon and the dates prepped, it's time to start combining your special bits with the rest of the dry ingredients. So first, I started scattering the bacon pieces into the flour mixture, stirring with a rubber spatula. As soon as the first batch of bacon pieces was coated nicely, I went ahead and bit by bit added the rest, making sure to mix and have them evenly distributed throughout the mixture. The dates were a bit trickier. Since they want to stick together so badly, I would scatter them at far ends of the powder, making sure to separate the bits before throwing them into the bowl, and then mixing bit by bit in order to get each sticky piece properly covered with the flour mixture.
After all of the sweet and salty bits were incorporated, it was time to add the butter. This was admittedly a pain in the butt. You basically take a large grater, and start grating the butter directly into the flour mixture. Every few minutes you want to mix the frozen butter into the flour mixture using your rubber spatula, ensuring that it's not all just going to form a big clump of butter in the middle of the dough.
Scones, prior to baking
Finally, with the butter safely mixed into the dry ingredients and special bits, time to add your milk, and mix with the spatula until it starts to form a dough. Then, get in there with your hands. Knead for a few seconds until it feels like it has come together cohesively, and dump the dough onto a floured surface. I formed about an eight inch round, and proceeded to cut into 8 "pies."
The scones are then expected to firm up in the fridge for a couple hours. So place a piece of parchment paper onto a baking sheet, arrange your scones on the sheet, and cover with a big piece of plastic wrap. Two hours to go before baking time.... but with a half hour left, go ahead and preheat your oven to 400 degrees. By the time my oven heated up, it was go time for the scones.
I removed the scones from the fridge, discarded the plastic wrap, and proceeded to brush with the reserved bacon fat we were so careful to save earlier. Last step? Sprinkle each scone with a bit of sugar. The recipe says to use raw sugar, but I didn't have any on hand, so as it goes, regular sugar works just fine.
Bacon and date scone: heaven
The scones went into the oven and came out 18 minutes later. A toothpick in the thickest part of one of them came out clean, and they were finished. What a beauty to behold! They smell heavenly. The outside has baked up crisp, a wonderful crust housing all that calorie packed goodness we took such care to distribute throughout the pastry.
Fluffy, salty, sweet perfection
The first bite, however, truly revealed what a wonderful recipe this is. The slight crunch of the crust, enhanced by our extra care to brush with bacon fat and add sugar. The inside is ridiculously fluffy, steamy and soft. Much of the dates have actually distributed sugar throughout the dough, but every so often there is the gratifying chew of the sugary sweet jewels. Then there is the bacon. Bacon has so many great purposes. It pops up in unexpected places to enhance foods that you think had already become all that they can possibly be. This bacon still has integrity as a meat since we diced it into fairly large pieces, revealing just that right amount of chew. It's smokey and plays greatly with the sweetness of the dates. There is an added richness to these scones I haven't seen in your typical breakfast scones, but that richness in no way makes these fluffy treats leaden or heavy. They are downright pillowy inside.
I'd make these again. In times of war, these are peacemaking bacon and date scones. Maybe we'd have less wars or at least quicker wars if people went to the scones first in trying to negotiate a truce. At any rate, they were truly excellent, and again shows how well thought out combinations of salty, smokey and sweet always make for a home run.

Sunday, January 8, 2012

The Miracle Boule

Your ingredients
Recently, after watching French Food at Home on the Cooking Channel, Laura, the host, made a ridiculous claim that she had a bread recipe that was "easy." Bread making is typically something I leave to the experts who have special yeasts and scales for the weight of each ingredient, and magical leprechaun ovens that only produce rainbows and perfect baguettes. Having none of these things, and only a few times having limited success with a bread machine (tons of fun... but after losing a recipe book it's kind of useless), I've generally felt terribly intimidated by breads and equally justified in purchasing better products than I could ever produce from A&J King's Artisan Bakers in Salem. But this one time, on her claim that the bread was easy to make, and watching as she produced something picture perfect, indubitably through the magic of television, I took up her challenge. I'll try her "Miracle Boule," as she called it.
The recipe was easy enough to remember, but if you need it, it's also online here. There are only four ingredients:


3 cups of ordinary all purpose flour
1 1/2 cups of water
1 1/4 teaspoons of kosher salt
1/4 teaspoon of instant dry yeast


Sticky, gross-looking dough, after
mixing the ingredients to combine
To start, I combined the dry ingredients in a large bowl with a regular whisk. Then I added the water, in quarter cup batches, and stirred each time with a spatula to produce an incredibly sticky wet dough.  Now, all it takes is time. As instructed, I covered with a tea towel, set it over my stove, which is usually the warmest part of my kitchen, and let it sit overnight. 
Little air bubbles after the
night-long resting
In total, I got to it a little later than I thought I would, and it sat for about 16 hours. Upon raising the towel, the dough had expanded and settled nicely into the bowl, producing little pockets of air bubbles up near the surface.
At this point, I floured a large cutting board liberally, and with a spatula, carefully dumped dough from the bowl onto the floured surface. You are instructed to fold over once or twice, so I went for the two-fer, also at this time removing any little patches that looked dried out... not sure if it matters, but it can't hurt either. I kind of loosely molded the blob into a circular shape, floured the top well, and covered with a tea towel again. Time for the dough to sit for 15 minutes.
Fifteen minutes past, and again the dough needs to be re-plopped (not kneaded at all, surprisingly). So, Laura says to heavily flour a tea towel to prevent the dough from sticking. Check. Next, shape the dough loosely into a ball, and plop onto the tea towel. Finally, add flour again to the top, and cover with a tea towel. Another two agonizing hours of resting, and the dough will grow quite a bit in size.
Dough, all rested, plopped into
the dutch oven and ready for baking
After an hour and a half of resting, you'll want to turn on your oven to 450 degrees to preheat. Stick a heavy dutch oven into the oven while it preheats so that it can also come up to temperature.
Are your total 2 hours up? When mine were, I removed the dutch oven from the oven, dumped the dough inside, seam side up, gave it a quick shake to have the dough fall as much into the center of the pot as possible, and covered. Back into the oven with the dutch oven.
Half an hour having passed, I removed the lid, which allows the bread to brown a bit. Fifteen minutes after removing the top, what you have is a lovely golden brown crust, speckled with flour, and smelling heavenly. Time to remove from the oven. Having removed the pot, I proceeded to take a spatula and another wooden spoon and gingerly removed the bread so that it could cool on a cutting board. 
Finished boule
Soft, fluffy center - perfect crust
This is the prettiest bread I've ever made. It was, indeed, very easy, though you do need to have your timing worked out, since there's a lot of resting, followed by a teeny bit of resting, followed by a medium resting, and finally a small bit for baking. The bread's crust is flawless. It's crunchy and has depth and flavor like a great crispy pizza crust. The center doughy bit is light and airy, with just enough chew and pull. It's so satisfying to bite into. Crunchy crust, light pull apart center, and that touch of yeasty sour flavor as well. If you think bread is too high a mountain for you, you need to try this recipe.
PS - I went skiing today, and this bread served as the perfect platform for a BLT sandwich... you know it's good when everybody in the lodge who walks by looks a little pissed off at their PB&J or turkey sandwich on wonderbread. 

Monday, January 2, 2012

Chicken Liver Mousse

Cleaned chicken livers
Do you like chicken liver mousse? I know that I adore it. For all manner of special occasions growing up, my mom would make an amazing chopped liver pate. And I'll admit that until I reached adulthood, I thought the stuff looked a little like poo, and smelled mighty funny. But adulthood hits you like a ton of bricks, and suddenly all the foods that looked nasty start to open worlds. Chicken livers are a gateway food, in a sense.
So unlike my mom's liver mousse, and more like the fancy pates that I'd enjoyed up in Montreal, etc. I found a great recipe by way of epicurious, had about a pound of the most wonderful chicken livers, purchased from Pete and Jen's Backyard Birds and frozen back in the summer, and swooped into my local green grocer, Milk and Honey in Salem, MA, for the other minimal ingredients. That's really the beauty of this recipe. The prep and the ingredient list are both short and simple.
To start out for the mousse, you'll need:
1 pound chicken livers, cleaned
4 cups milk, divided
2 cups (4 sticks) unsalted butter, room temperature, divided
3 tablespoons finely chopped shallots
3 sprigs thyme
2 tablespoons Calvados (apple brandy)
2 teaspoons kosher salt plus more
1/2 teaspoon freshly ground black pepper
1) Prepping the livers. Take the time to clean your livers, ensuring that they don't have any amiss sinew and such. Next, soak your chicken livers in a couple cups of milk. Cover and chill in the fridge for two hours. Then drain the milk, and add another two cups to soak for a couple more hours. After this is done, go ahead and give your livers a good rinse, and dry with paper towels. 
Saute thyme and shallots,
then add chicken livers
2) Cooking. Add 2 tablespoons of the butter to a frying pan, add the thyme and diced shallots, and cook on low heat until the shallots are nice and soft. When they reach this point, you can add your livers, turn up the heat to medium, and cook until still a little pink in the middle. I cooked a little less than the recipe specified, about three minutes, but it's really up to you, and how much you trust the quality of your offal. Now remove from heat, add the Calvados, return back to heat and let the alcohol reduce a bit, by about half. Remove the thyme. 
Ready to add butter in
the food processor
3) Get ready to butter. Throw your liver/shallot mixture into a food processor. Process until smooth, and then while the machine is running, add your sh*t ton of softened butter little by little. When all the butter is incorporated, turn the machine off, and strain the mixture through a mesh strainer. 
4) Chill. You're going to need to distribute the liver mixture into containers, and I like little glass jars. Then they need to be covered with plastic wrap, and left to firm up in the fridge for about one to two hours.
After the gelee has set, ready for tasting
5) Gelee! After your livers have firmed up nicely, put a quarter cup of water into a microwave safe container, and add 1 teaspoon of unflavored gelatin. Throw it into the nuker for about thirty seconds on high, just enough to dissolve the gelatin. Add 2 teaspoons of sugar, and stir until it dissolves. Now add about 3/4 of a cup of sweet Riesling and stir that in. Spoon the mixture gently into each of the liver mousse jars so that there's about a quarter inch layer in each jar (you'll probably have some left over - jello shooters for you). Now add a tiny sprig of thyme to each, cover, and they're ready for the fridge. All said and done, they take about an hour for the gelatin to set. 
Liver mousse with riesling gelee
And there you have it! Literally, these are among the prettiest things that I've ever made. And it was really easy. But looks aside, this is a hell of a pate. Best after being left to warm up just a bit at room temperature, the liver mousse is rich and savory. It's creamy, and saturated with all those good things in life, AKA butter, herbs, and offal. With a nice stable cracker a tiny bit of the sweet, slightly alcoholic gelee, you've got a solid crunch, and that wonderful feeling of something very unctuous coating your entire mouth. The liver was certainly a hit among friends, and I encourage you to try it. It might even turn a finicky eater to the dark side of adventurous noshing.